In addition to my advice on drawing tilesets with Photoshop, I decided to do the same for vector graphics tilesets with Inkscape.
In the last months, I started to mainly use vector graphics for my game art. In case you don’t know, vector graphics and its standard format SVG are a way of representing graphics by storing mathematical descriptions (like position, size, color etc.) of geometrical objects. Besides common shapes you can also create paths and complex objects with an arbitrary number of edges and curves. By combining the different techniques it’s possible to model almost any object you can imagine.
Why vector graphics?
Vector graphics have three huge advantages over normal raster graphics:
- Infinitely scalable
You can zoom in and out as you like without any loss of quality. This is perfect for creating graphics for different screen resolutions.
- Completely editable
As long as you keep your SVG you can comfortably edit every single part of your objects.
- Tiny file size
Standard SVG is an XML-based format. Unless it contains a gigantic number of objects, the information doesn’t take up a lot of space compared to high-res raster graphics. This is more relevant for web applications (the browser can render SVG directly) as it is for games (most game engines require rasterized graphics).
Vector graphics are the best?
“If vector graphics are so great, why should I use those pixel graphics anymore?”, you may now think. Depending on your use case you may be right and vector graphics are really the better choice. However, there are areas where SVG should not be your primary selection. Here’s a little overview on when to use what:
| Vector | Raster |
| Icons and Logos | Photos and realistic images |
| Game UI | Textures |
| Flat-style game art | Detailed game art |
| Animations | Pixel art |
| Backgrounds |
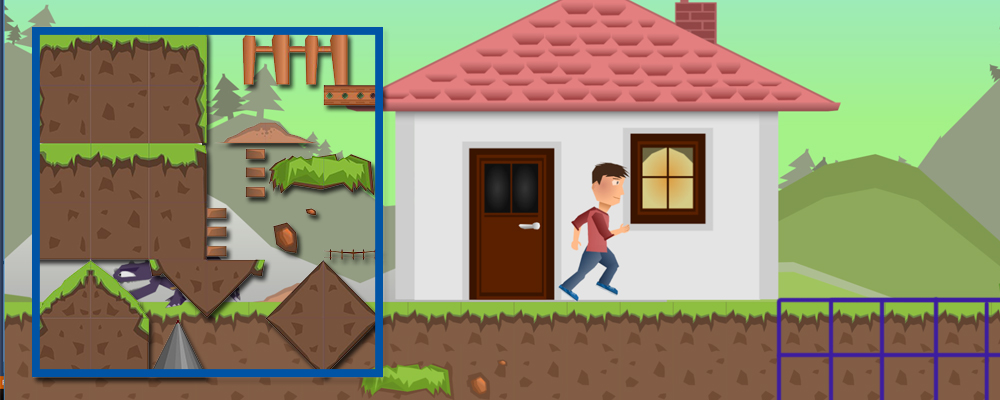
Back to the Tileset
Now with that little introduction in the greatness of vector graphics, let’s get back to our actual topic: building a tileset. In my Photoshop-Tileset article I started with the point “Consider tile size”. Using vector graphics, we don’t care about tile size (until we export it as bitmap). We just want to make sure to have squared tiles, so we enable a rectangular grid:
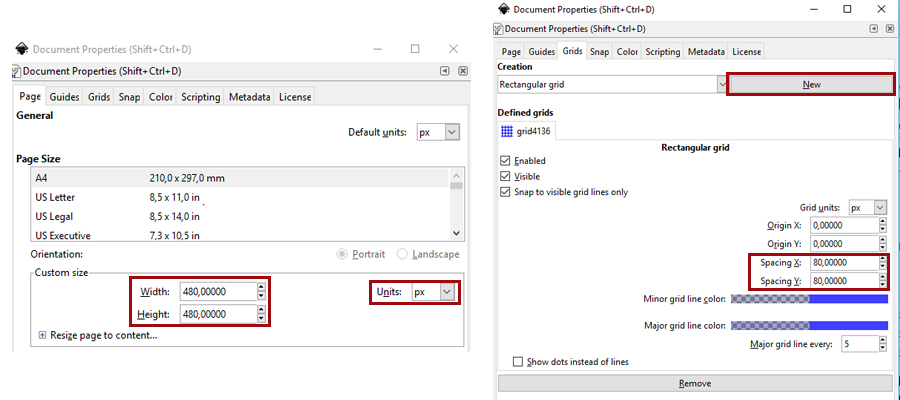
- Go to File > Document Properties
- In the tab “Page” set units to px and Width and Height to an even value (doesn’t have to be the actual resolution you want, just the same ratio). I chose 480×480.
- In the tab “Grids” create a new rectangular grid and set both Spacing X and Spacing Y to the arbitrary tile size (a factor of your width/height).
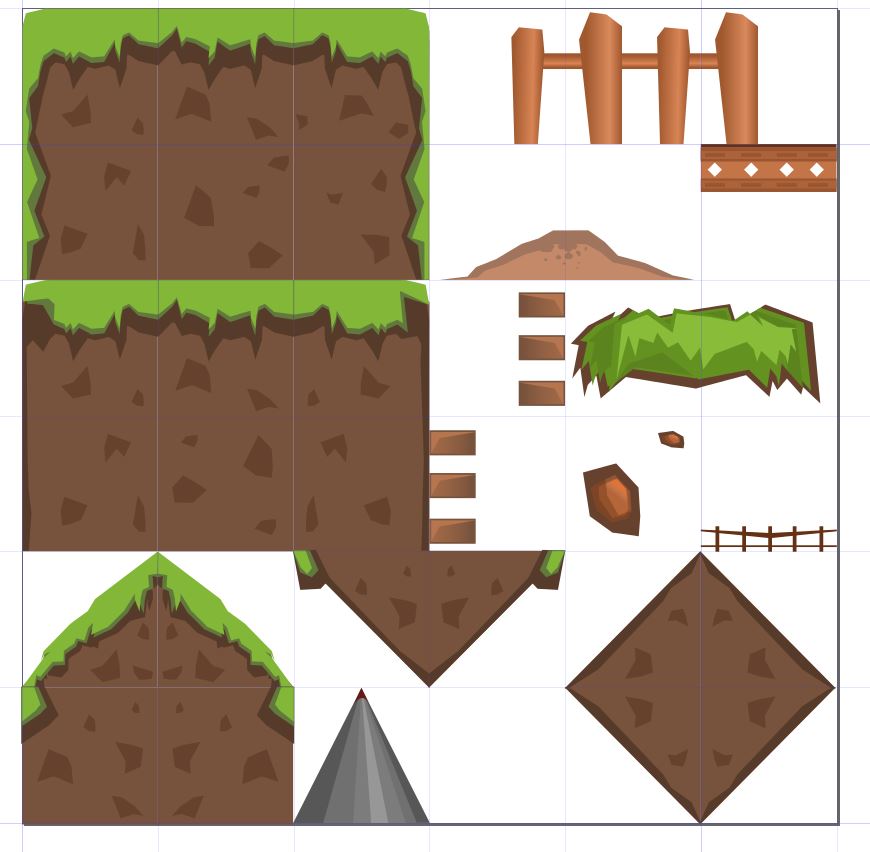
Start Drawing
Just create your objects and make sure to place them properly inside the grid. This can be a little tricky because, unfortunately, Inkscape’s snap functionality doesn’t really work. If it’s enabled I would recommend disabling it by pressing the % key.
So, the best way to align objects is to actually zoom it very close and then place the object as accurately as possible. Once you have successfully aligned an object, hold Ctrl while moving other objects, in order to keep the alignment vertically or horizontally.
The good news: transitions pretty much work the same and are easier to handle than with pixels. If you have an object overlapping the tile’s boundaries, just duplicate that object and move it to the opposite side while holding Ctrl to keep it aligned.
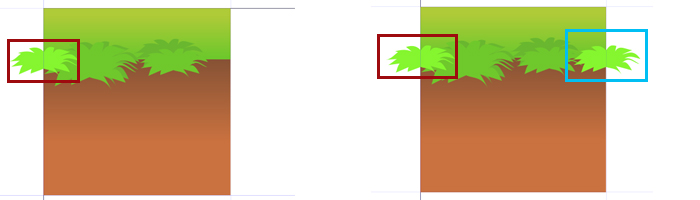
You can then remove or just ignore the overlapping parts.
Exporting the tileset
No matter how you draw your tileset, after all you generally want to end up with a rasterized PNG image when dealing with 2D games.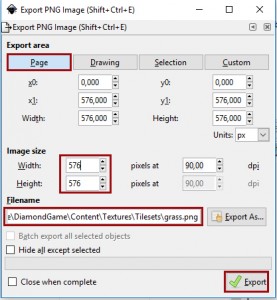
This is also the first time in this process you have to think about the required resolution. Luckily, it’s no problem if you need a different one later. You just export it again with different settings.
The export itself is as simple as this:
- Go to File > Export PNG Image, or press Ctrl+Shift+E
- Select Page as export area
- Enter your desired width and height of the output image (keeps aspect ratio, so entering one of the two should be enough)
- Select output file path and file name
- Click Export
Hopefully, I could you help by showing my way of creating vector graphics tilesets with Inkscape. If you come up with any improvements I’m always glad to hear. If you want to learn more on creating easy game art with Inkscape, check out my Youtube series Easy Game Art. Have Fun!